
I must write something about the importance of good lighting every week, but good directional sunlight is so important for bird photography that it’s paramount to creating good photos of birds, and great bird photos. Light obviously illuminates the birds you photograph, and it dictates how vivid your colors are, how sharp and clear your images are, and how well your camera works, technically. Light dictates your camera settings for shutter speed, and aperture, and ISO, all of which mean so much to making sure everything will gel when you press the shutter button with that special bird or flock of birds in your viewfinder.
The following information will be woven around the theme of light, including some obvious topics, some new material, and some tips and tidbits you’ve read here before. But this is the most focused article I’ve provided about sunlight and lighting of your favorite subjects, birds. I’ve learned a lot from a reading photo-based books and magazines, from talking with and photographing with a lot of people – and from personal experience, all too much of which was learned from mistakes. But you can learn from my mistakes and benefit from my wealth of experience and study – quick and easy, here and now, for free!
Timing – As they say, timing is everything, and timing your bird photo sessions during the periods of the day when the light is best is extremely important – when possible. First, on cloudy days I find something else to do. Bird photography is always best when there is adequate sunlight from the optimum direction and angle. Sunny afternoons and mornings are usually best, so find something else to do during midday too when the sun is overhead. The window of harsh overhead light shrinks appreciably during the winter, when the position of the sun is to the south and in some locations, you have good sunlight throughout most of every sunny day. During summer, depending on your latitude, it’s best to pick a photo period during the morning and late afternoon to early evening, when the sunlight’s angle is midway between straight up and the horizon.
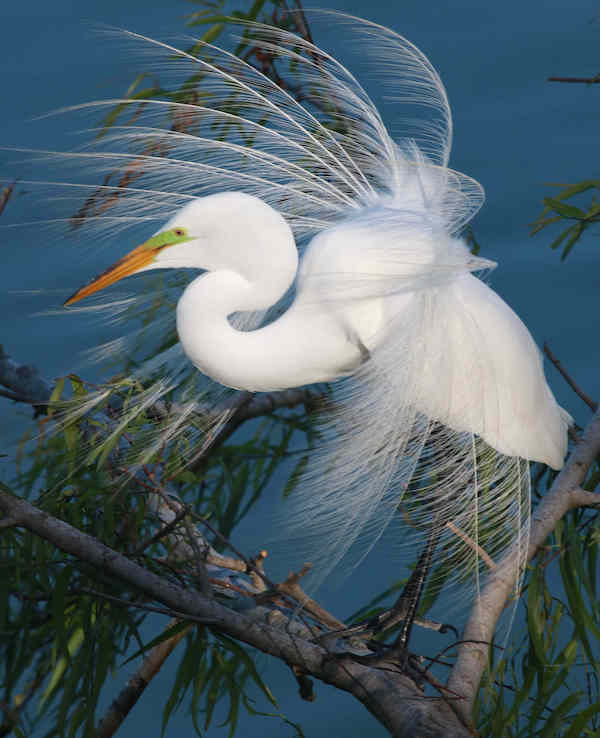
It’s All in the Angle – Speaking of the angle of the sunlight, mid- to late morning and late afternoon provide the best angle of the sun for photography, when the sun is between 30 and 60 degrees above the horizon – a 45 degree angle may be the optimum sunlight angle. To easily assess the angle of the sun, consider the horizon is at 0 degrees, and straight overhead is 90 degrees Therefore, 45 degrees is exactly in between. Once you have taken some photos with regard to the angle of the sun, in the morning and during late afternoon, and any other time, you will appreciate this sage advice more and more, and it will become a guiding interest as you time your bird photography periods.
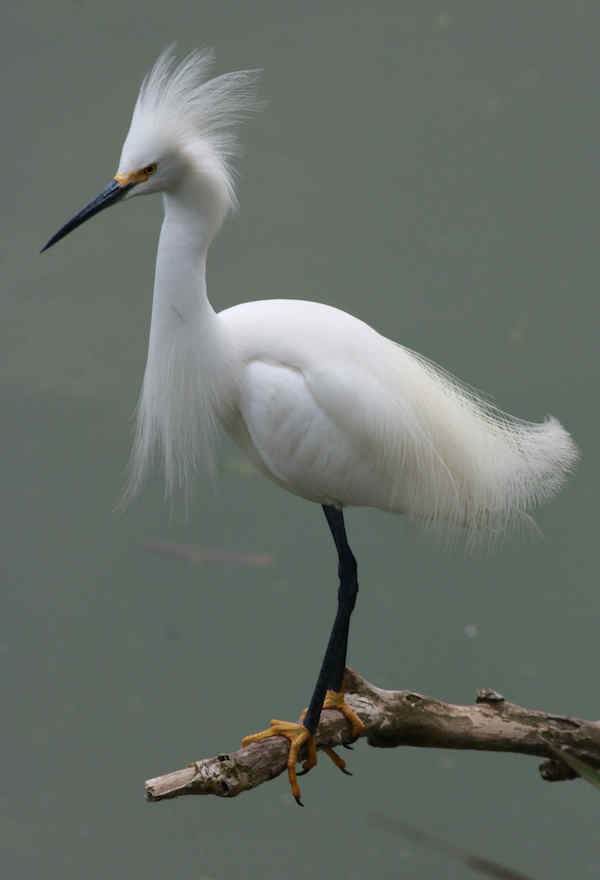
Photographed during a cloudy afternoon, you can see the light is from a mostly overhead direction, the colors are dull at best; the otherwise blue water is gray as it reflects the clouded sky, and the eye is barely evident in spite of the Snowy Egret’s plumed display.
|
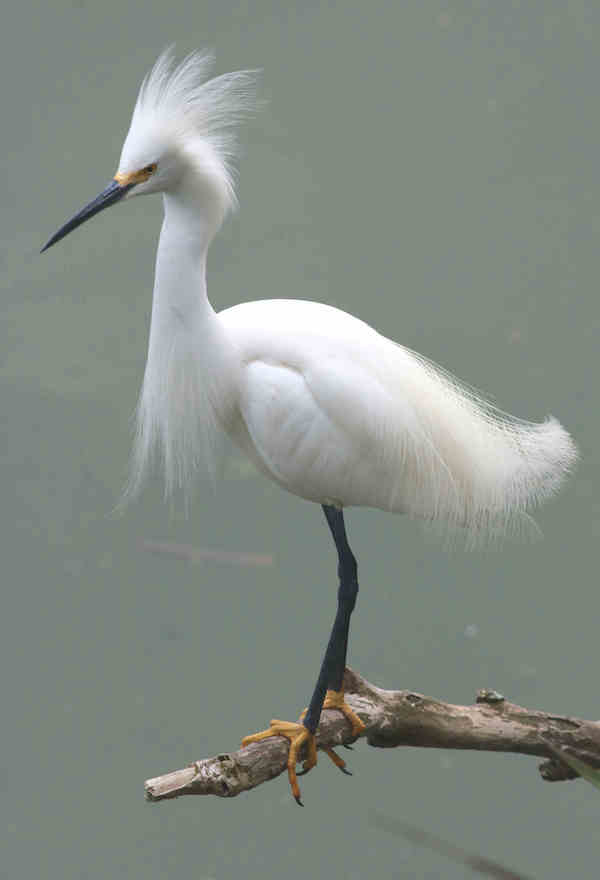
Using a photo editing software to try to improve the photo by brightening the image merely created a better poor image with the same lighting and color problems as the original photo.
|
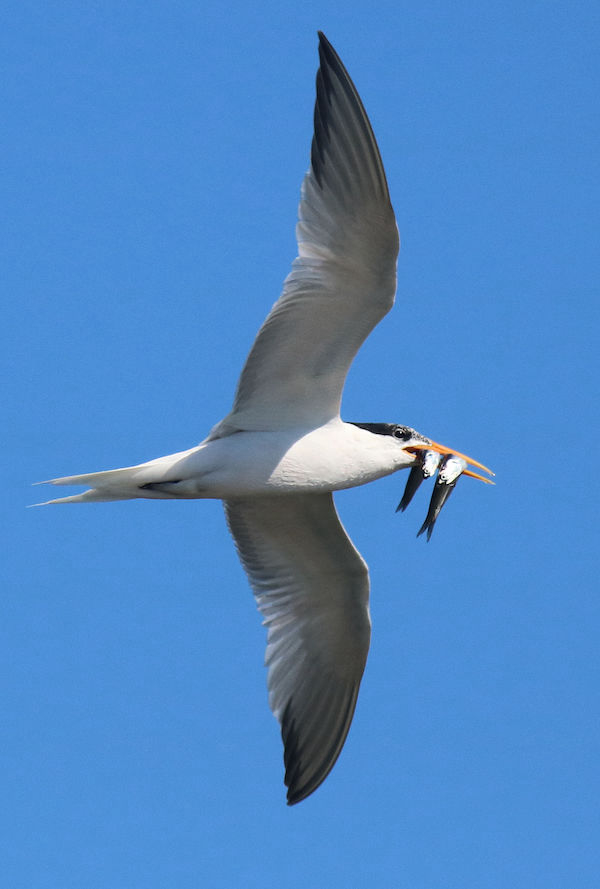
Keep the Sun at Your Back – When you are photographing birds, be sure you are positioned so the sunlight illuminates your subject as directly as possible. This means you want to position yourself between the sun and your subject, and simply said: Keep the sun at your back. The best way to quickly assess whether you’re in the right position is to: Keep your shadow pointing at your subject. This may require some repositioning if you’re not in the right place, but if your shadow is pointing to the side of your subject, you simply do the best you can under the existing circumstances. Don’t hesitate to take photos when you’re out of position as a safety measure, but then try to get into a better position to utilize the best direct sunlight. If you are out of position, you will see shadowing on one side of the bird or the other, which will effect your image – it’s just a matter of how much.
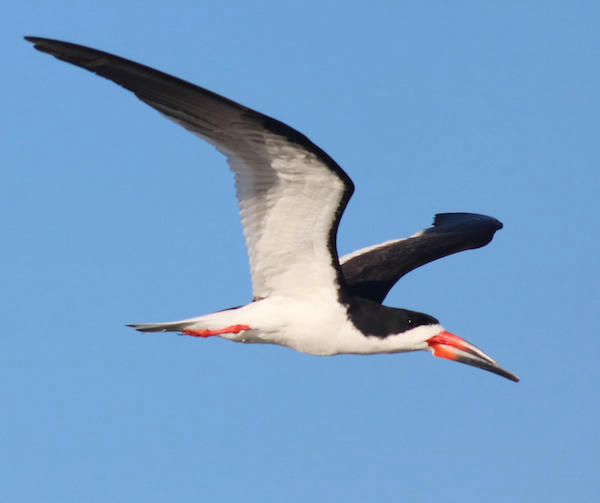
Be Aware of Shadows – Avoid shadows on birds – keep in mind that a camera makes shadows darker on photos than the way your eyes perceive shadows. When the sun is positioned overhead, the underside of a bird will be shadowed, dark and mostly featureless. This is true whether it is the belly of birds or the underside of their wings in flight – or their wings can be making shadows across their body as they fly or glide. It’s something to be aware of and try to adjust in an effort to improve your photo session with a bird or birds. Shadows are something you should keep in mind and monitor when you are positioning and composing a photo or photo series. It’s also especially important to be aware of shadows as you edit photos. You can learn from the practice of editing, and don’t hesitate to dismiss photos in which shadows minimize the quality of the image.
Imperfect Sunlight Conditions – It’s best to try to minimize photographing during poor sunlight conditions, including cloudy periods, by planning your photo sessions during periods of good sunlight. It’s best not to put yourself in unproductive circumstances; photograph when the time is right, when sunlight is right, and you will save time and maximize the potential of the photos you take. In some cases, such as when you are traveling, especially in areas like cloud forests and rainforests, where sunlight rarely breaks through during some periods of the year, you can always take documentary photos as best you can. But under poor sunlight conditions, birding without a camera is always an option.
Optional Lighting – Artistic bird photography is nice on a personal level, but too often quality is sacrificed for artistry. Case in point: Too often, artistic photography is being over-emphasized by some editors and photo contest judges that are selecting artistry over true quality. The practice is highly over-rated and may include photos in which back-lighting or side-lighting with unacceptable shadowing to be considered as preferred to photos with quality lighting that accurately illustrate or even artfully depict birds. That is discerning and should not be taken as a directional cue. Enjoy artistic bird photography when opportunities arise, but strive for definitive photos of birds with the best direct sunlight possible.
Photo Editing Fixes – Try not to rely on photo editing programs to fix photos with poor lighting. Rarely can a poor photo become a good one, much less a great one, without the right light to begin with. You can try to doctor up your photos that have only so-so lighting, but I’ve tried that too many times to rely on it in any way. Only in extreme cases should you even try to fix a poorly lighted photo with photo editing software tools, primarily because it’s mostly a folly of hope.
Planning Ahead – Use the above information when you are planning a photo visit to a favorite birding location with your camera, and keep in mind whether a morning or afternoon visit will provide the right sunlight direction to illuminate the locations where you hope to find birds to photograph. Even if you are taking an exploratory birding drive, appreciate that when driving north and south you will only be able to photograph birds on one side of the road, and when driving east and west, again you will only have good light during morning – or evening. However, when on an east-west route, you can always drive past a bird, then U-turn and return to attempt a photo with the sun at your back. In short, plan your photo periods with respect to the direction and angle of the sunlight.
Review Some of the Best Bird Photographers’ Images – Take a look at some of the selected photos by our great bird photographers and study the lighting of the photos that catch your attention. For starters, check out the photos used on the eBird pages, and you can check out one of my favorite bird photographers – Brian Small. Brian’s website is quite amazing, and we can all learn and be inspired by his bird photos of the highest quality. Appreciate the natural sunlight in the photos he showcases at https://www.briansmallphoto.com/taxonomic.html
Again, lighting is everything in photography, and sunlight especially drives quality bird photos. You can improve the photos you create by being more aware of timing, the direction and angle of sunlight, shadows, and your camera settings. But more than anything, enjoy your time among birds with a camera and lens that permits you to strive for ever-better photographs of the birds you see. And as always, Good Luck!
Article and photographs by Paul Konrad
Share your bird photos and birding experiences at editorstbw2@gmail.com