Simply stated, quality birding requires one simple level of assistance – a binocular – which is just as important at home as it is in the field. When you are at home, viewing birds outside a window as they visit your feeding station or birdbath, regardless of how close and how clear a view you have, it's always worth taking occasional closer looks with binoculars. We keep a pair of binoculars positioned within reach at a favorite seat to get a closer view as warranted or anytime you wish to zero in when a favorite bird appears – or when a rarer seasonal sighting inspires a closer look. Any binoculars will be helpful in your yard, or while sitting in your living room or office, but you can improve your backyard birding experiences with the right optics.
Birders and business owners will be especially interested to learn that not only are more than 96 million Americans identifying as birders – more than 1/3 of our population – but they are learning that we birders spend $107½ Billion Dollars annually on birding trips and equipment that includes binoculars, cameras and lenses, spotting scopes, clothing and footwear, bird foods, feeders, nest boxes, and much more. Spending by birders helps to support jobs and business activities in local economies across the country. Direct trip-related and equipment expenditures are only part of the economic contribution of birders, because the economic activities of birders have ripple effects throughout local and state economies.
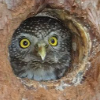
In woodlands, forests, and even in our yards, trees continue to provide life after death; snags provide nesting sites, food, and cover for owls and a variety of cavity nesting birds. The life of a tree doesn't end when it dies, it simply transforms. Owls are a special family of birds that depend on dead trees – snags – owls that range in size from Great Gray Owls to Screech Owls benefit from snags across the United States and Canada. And by protecting a snag or a number of them, we provide an area of habitat for an interacting web of life that extends from forests to open woodlands, and even our backyards.
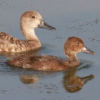
As often happens during prime birding periods, a 2-hour drive to Bismarck turned into a 6-hour birding extravaganza with a variety of photo opportunities – expected and unexpected. Actually, it was smooth sailing until I reached Long Lake National Wildlife Refuge, 25 miles southeast of the capitol city, which was the initial hangup in my schedule. The refuge provided flock and portrait photos of White Pelicans, flying Bald Eagles, 4 species of swarming swallows, a mix of Black Terns with Common Terns, and a mix of scattered Wilson's Phalaropes with Franklin's Gulls; along with Spotted Sandpipers, a variety of ducks, and a beautiful newly fledged Red-tailed Hawk.
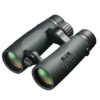
Pentax offers the only 9-power magnification binoculars that provide a boost from standard 8x binoculars. The heralded Pentax SD 9x42 Binoculars provide premium multi-layer lens coatings that assure maximum light transmission through the entire optical path, resulting in bright, sharp, true-to-life colors when birding in a variety of landscapes and lighting conditions. The roof prisms are phase-corrected to ensure bright, high-contrast views of birds, and the increased 9x magnification still provides an ample field of view of 321 feet at 1,000 yards.
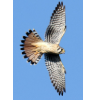
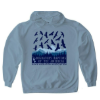
The highly anticipated new Raptor Silhouette Collection of shirts, hoodies, and totes from the Hawk Migration Association features artistry showing 16 migratory raptor silhouettes. The "Migratory Raptors of the Americas" design celebrates the remarkable birds that connect communities across the Western Hemisphere through their long migration routes. The new products are selling fast, and the catch is that these impressive raptor tees are only available for the 15 days through Bonfire. You can choose from adult T-shirts, youth T-shirts, long sleeve tees, hoodies, or tote bags available in stylish colors!
You can provide a decorative antique-green pedestal birdbath that attracts more birds while you enjoy the serene sound of water cascading among 3 fountain tiers. The multi-functional Alpine 3-Tier Fountain Birdbath provides a colorful design element to your feeding station, garden, patio, or deck while providing shallow water basins for birds to drink and bath. Serving as both a decorative water fountain and birdbath, the moving water will attract birds who hear the sound of moving water, and it has an inviting bird-friendly design. This attractive pedestal fountain stands 35 inches high with a diameter of 20 inches.
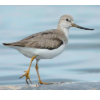
Record rare birds include an impressive First State Record Terek Sandpiper in Washington, a Fourth Provincial Record Broad-billed Hummingbird in Ontario, and a Fifth Provincial Record Eastern Wood Peewee in Alberta. The Lesser Frigatebird is being seen again along the coast north of San Diego, California, and there are many Asian shorebirds being documented, including a Little Stint in British Columbia, a Red-necked Stint in Washington, a Long-toed Stint in Alaska, along with a Common Greenshank and another Terek Sandpiper, with Curlew Sandpipers in Michigan and New Jersey – and there's more!
Some of the most beautiful birds in flight, American White Pelicans are unique in their looks when you see them in close quarters (not necessarily the prettiest birds). I see these big white birds daily from early spring to fall, with groups even gliding over my house at times; and they commonly rest and fish in area marshes and lakes, sometimes in flocks, small and large. They nest in a couple huge nesting colonies 25 miles northwest and 80 miles north and search for food across a broad region – mostly fish and salamanders in this area. In fact, Chase Lake National Wildlife Refuge has long attracted the largest nesting colony of White Pelicans in North America.
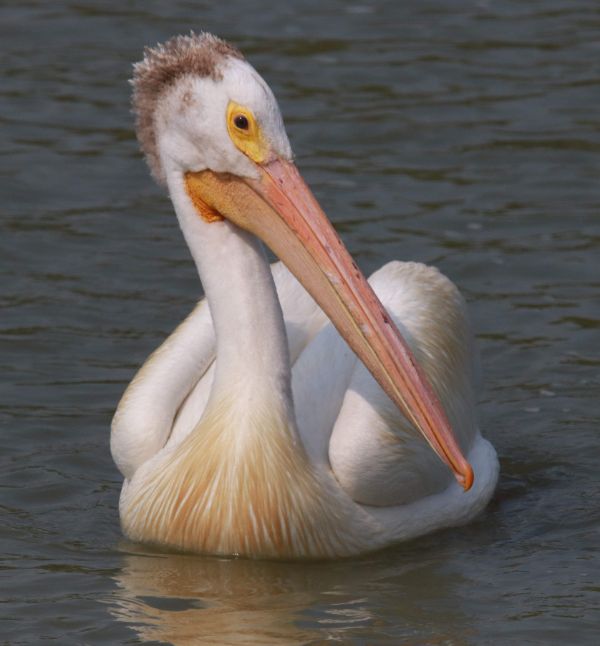
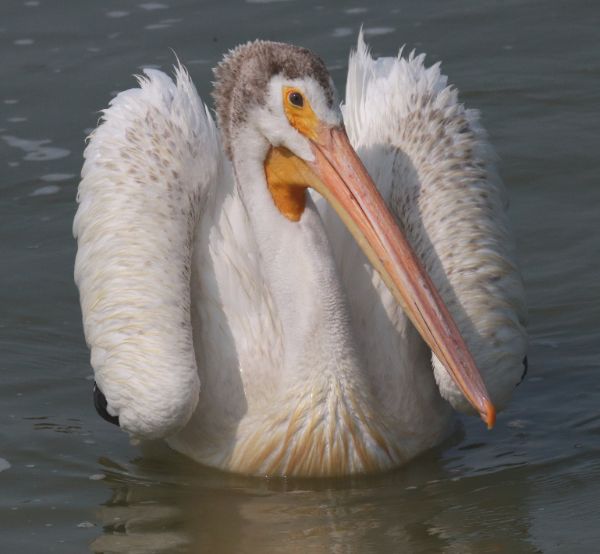
A stunning portrait that shows a lot of personal character. Each of the pelicans showed individual characteristics and moved into a variety of positions that made this photo session especially fun (480mm zoom lens, f-11 aperture, 1/3200 shutter speed, 800 ISO).
I photograph White Pelicans when the opportunity arises – in flight, swimming, fishing, resting – but when I visited a favorite bird photo stop last Wednesday, a new photo opportunity presented itself – Pelican Portraits. During this period of summer, I usually encounter Western Grebe families with downy young riding on the backs of some at this site; along with pelicans, cormorants, and ducks, so I was excited to see what birds would be present. As I neared the low bridge that provides photo access on the closed roadway, I could see many White Pelicans, and it turned out that about 40 pelicans were dominating the stream that connects 2 big lakes.
A full side view of a favorite portrait subject still shows elements of a portrait, and the same bird is featured in the following portrait photo for comparison (350mm zoom lens, f-9 aperture, 1/4000 shutter speed, 800 ISO).
I stopped on the west side of the little one-lane bridge to get into the best position for the late afternoon sunlight to illuminate the big white birds in swimming motion. The pelicans reacted to my car’s arrival by swimming in a tight mass a few feet beyond their original position, but they quickly began spreading out again. That’s when I realized this opportunity had great potential to take portraits of individual birds as they assumed a variety of positions while floating or swimming on the water surface. I began zooming in and out to frame the photos with my 150-to-600 zoom lens, a very versatile photo lens for this kind of portrait photography.
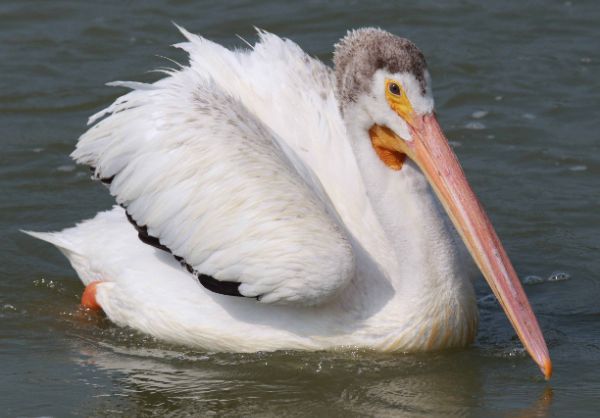
A lively portrait of this pelican shows it cooling by raising its wings high and to the side of its body to catch a light breeze as it swam in cooling water. That behavior added appreciably to the character of this face to face portrait (270mm zoom lens, f-11 aperture, 1/4000 shutter speed, 800 ISO).
That’s when it became very clear that each pelican had an individually identifiable face, bare facial colors, and plumage accents. With these elements in mind, I began photographing individuals whose features were interesting from a portrait standpoint as they assumed in a variety of positions. Obviously, we are not talking about beautiful birds on a head and shoulders level, but they are eye-catching nonetheless and I enjoyed the photo session for about 20 minutes as other pelicans flew in and landed, and cormorants, gulls, and ducks flew by overhead. In some cases I included the entire bird in the photo frame, to show how each pelican had its own body look too.
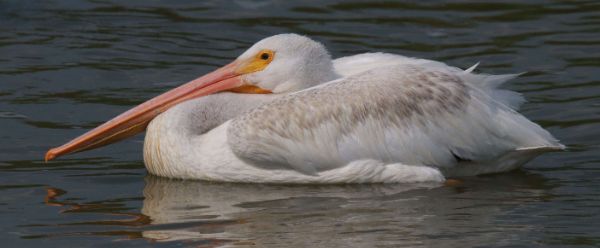
Resting appeared to be more important than cooling for this streamlined pelican. Note the length of the pelican's bill too (500mm zoom lens, f-11 aperture, 1/4000 shutter speed, 800 ISO).
One catch was related to the large area of white plumage the birds have. In the bright light of the period when the late afternoon slipped into early evening, the white plumage could effect the light meter in such a way as to overexpose the plumage, thereby masking the details of white feathers. I have been using the center-point focus option in my camera settings when photographing birds for some time, and that works well as long as you focus on the right location on any given bird. To avoid over-exposing the white plumage, I focused on the bill of each pelican I photographed, and that seemed to work well. I think if I focused on the face, it would work similarly well, as long as I didn’t focus on the bright white plumage.
Although the water did not look as dark as it appears in this and some other photographs, by trying not to overexpose the white plumage, the camera compensated by making darker-colored elements even darker - something to keep in mind when photographing white birds or birds with a white underside or head. (600mm zoom lens, f-11 aperture, 1/4000 shutter speed, 800 ISO).
It was fun and rewarding to spend time so close to such a large group of American White Pelicans, and photographing the big birds added a nice creative angle to this encounter. In each issue I like to try to share images I take during the most recent week, and that has worked very well for an extended period of time, providing a variety of different photo insights and techniques illustrated by the photographs I select to publish in each week’s Bird Photography feature. I often start the week with a clean slate, and during almost daily birding drives I eventually seem to manage to find a chance opportunity to take a series of photos that stand out, or point to a certain way of addressing a bird photography topic. Of course, I have plenty of photographs to illustrate any photo topic in my photo files, but I like to provide a recent, seasonal photo activity to keep my presentations current – and I’ve been lucky in that way. That effectively means that birds dictate each Bird Photography topic and illustrations, and what could be more fitting. Good Luck with your camera while you enjoy birding throughout the summer.