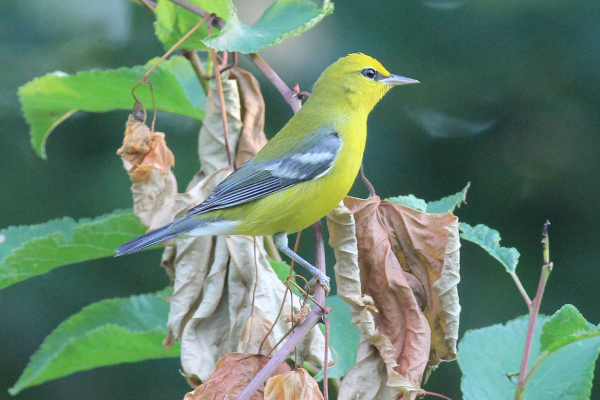
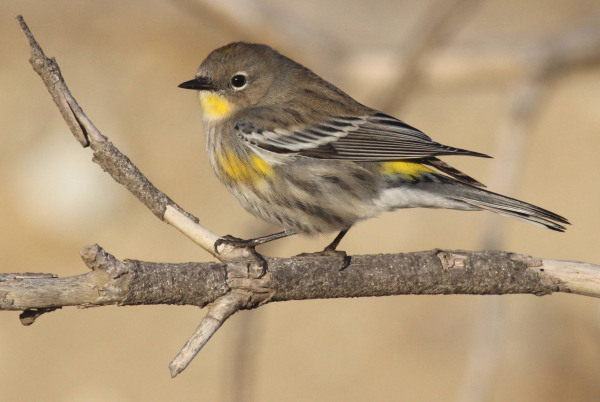
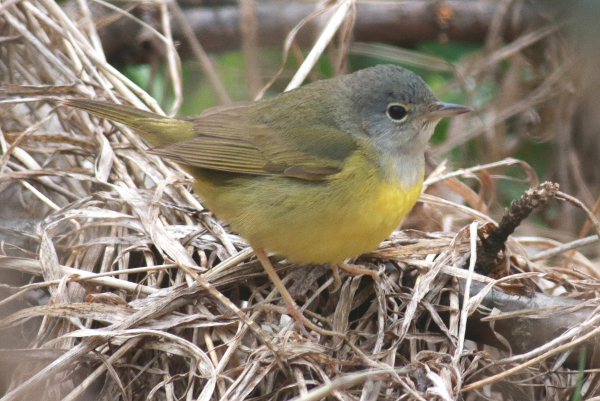
During spring warbler photo sessions we tend to zero in on colorful male warblers, but fall warbler photography is often very different. About half of the warblers in the fall flights will be young of the year, having fledged just a month or two earlier and, depending on the species, these young of the year may have muted colors, similar to females but distinct. Even most adult males will be in their basic plumage, which in some species more closely resembles the female coloration than their own spring colors.
A friend here in central North Dakota who works along the wooded James River Valley, posted that he sighted a male Black-throated Blue Warbler in fall plumage; a fledgling American Redstart, and a male Wilson’s Warbler in fall plumage, along with several male Yellow Warblers and one female – all during his lunchbreak last Thursday – with more Yellow and Wilson’s Warblers present Friday; so the fall warbler season has begun.

Fall warblers can become a personal challenge as we try to get photos of the fall plumages of a given species; but we are more likely to get photos of a random collection of the birds we happen to encounter. The most interesting thing about fall warblers is that when we review the varied fall warbler plumages we see that there is no single description for what to expect plumage-wise.
When you study your field guide, or better yet, a warbler-specific book, you will begin to see some overall themes on fall plumages. Some species have very little variation between spring and fall plumages (alternate and basic plumages). Some warblers show a muted coloration, such as Blue-winged, Canada, Kentucky, and Hooded Warblers. However, some species appear completely different, especially adult males like Bay-breasted, Magnolia, Chestnut-sided, and Cape May Warblers that tend to show little difference from females or first fall birds. Overall, first fall birds are usually the lightest-colored of a given species with less bold markings or colors, but fall adult females can be very similar to first fall birds.
As noted in last week’s Bird Photography article, getting documentary photos will help you make accurate identifications of some of the trickier plumages. Your photographs, whether keepers or documentary images, will help to make you a better birder overall. It’s also usually much easier to sort out the species IDs and the sex and age differences when you can look at your photographs of the birds and analyze them as still images that you can enlarge at will on your computer screen using your photo editing software.

Fall warbler sightings tend to be fleeting, with birds appearing, feeding, and moving on; but if you’re lucky, you will have a chance to try some photos. The real key to fall warbler photography is to find a warbler hangout. Where are warblers stopping over? Start by checking your spring warbler hotspots to see if they attract southbound birds. Then, monitor your yard and neighborhood, city parks, tree groves, wooded river and creek areas, wooded wetland edges. Your bird bath or water feature may be the best location, and always keep in mind that the sound of moving water is most attractive for migrating songbirds.
One thing that might be helpful to attract fall warblers and other songbirds to your position is to use a “mobile” water drip, as described in the Backyard Birding article in the July 31 issue (which you can access at the Archives button at the top of this page). You can hang a water drip in a promising location – even in your own yard – or you can move it to a location where you find an assemblage of warblers. Actually, you can position a number of these gallon-sized water drips in different locations and see what turns up on a promising day.
In short, the mobile water drip is an empty gallon-sized plastic milk or juice jug with a pin hole in the bottom that can be filled with a gallon of water and hung above a shallow basin to provide a water drip that will make the kind of sound that warblers and other songbirds listen for as they arrive and move through new areas during post-nesting movements and migration stopovers.
As always, be aware of the direction of the sunlight and keep the sun at your back, which will ensure the sun is illuminating your subject best. Plan your photo sessions for morning or late afternoon hours when the sun is at a low angle. Depending on your site, an afternoon photo effort may be best to use ambient sunlight, or if your location faces west, a morning photo session may be preferred. Again, that’s where scouting comes in, check for birds and check for lighting conditions and how they may change throughout the day.

It’s probably best to use a narrower depth of field when photographing warblers; try using an aperture of say f6, which will provide a good focal area to keep your bird in focus while throwing the background out of focus. This strategy helps to emphasize the bird and provide a more pleasing, less cluttered background. It also provides the most optimum shutter speed to stop action and provide details in the bird and its environ.
Warblers are fast-moving active birds that seem to be constantly on the hunt for small insects and spider and insect larvae, weaving their way through leaves and twigs and branches and trunks of trees, making a quick jump, hop, and short flight here and there, so you will need to think quickly, keep up with the action, and take LOTS of photos when you have opportunities. We tend to take a lot of photos of warblers to get a precious few images of them.
Pay attention to the pulse of warbler migration; keep in touch with your state’s birding listserve or reports posted to eBird for nearby hotspots. Also, be aware of the birds in your yard and at your feeding station – the birds you see at home can tip you off to the bigger picture of what’s going on day to day and hour to hour during fall migration. When you see warblers and other migrant songbirds appear in your yard or neighborhood, head for your nearest warbler hotspot to see if there is more action there. If the sun is shining, use it to your best advantage.
If the light isn’t conducive for photography, maybe it’s worth trying a few flash photos, utilizing your camera’s flash with an automatic setting. You won’t take many photos because the flash will probably scare most birds, but it might be a learning experience, and who knows, you might come up with a new angle that will help you get more out of your fall warbler photo opportunities.
If lighting conditions just aren’t good, keep your camera within reach, but use your binoculars to study and enjoy the excitement of the fall migration pulses. Sometimes we can learn more about variations of bird photography without a camera in hand – it’s an exciting aspect of this special segment of the early fall birding season. Good Luck!
Article and photographs by Paul Konrad
Share your bird photographs and birding experiences at editorstbw2@gmail.com
