
With the end of January pending, I must ask if you have your photo files in order for the past year – 2020? It’s really past time to get things organized, but never fear, there’s no time like the present – or maybe the next cloudy day, snowy day, or quiet evening. Then too, the best way to keep your photos organized is to be organized throughout the year, and now’s the time to get that plan in motion for 2021. If you keep up with reviewing and editing your photos on a weekly, monthly, and seasonal basis – like me – all you need to do on New Year’s Day is to finalize your 4 seasonal files inside a “2020 Photos” file, and you’re done.
I must admit though, I have one more thing to do to wrap up my 2020 files, and that is to create a “Best of 2020” file in which I duplicate all the “best photos” I have selected from the hundreds of photos I’ve taken throughout the year. These tend to be the photos I have already devoted the time to review, select, and photo edit into a finished product. But I’m getting ahead of myself. Let’s start from the beginning to address organizing your 2021 digital photos – to make your year-end organizing simple. If necessary, you can backtrack to get your 2020 files organized better too.
Some of this information may be second-nature if you are a long-time photographer, and some of it may be different than your preferred way of filing photos. That’s OK on both accounts, but I will share my methods here with the hope that some of you will benefit from my methods, and some advanced photographers might find a tip or two that’s helpful too. The main thing to keep in mind is that you should do what works best for you, improve on what I share to better serve your personal interests, and appreciate that having organized photo files is helpful, and standard practice. Here we go:
From Camera to Storage Files
Each digital photo you take is initially automatically stored on a memory card in your camera. You may be storing your photos on your personal computer. That’s fine, but most photographers take so many photos that they prefer not to keep their digital photo files on their home or office computer. Instead they save their photo files in a separate external hard drive, which is a compact device about the size of a cellphone that you connect to your computer via a simple USB cable whenever you need to save, refer to, or copy photos.
I find this plan is the best bet; over time, you will need the expanded memory that an external hard drive offers. These days a couple terabytes (TB = 1,000 gigabytes) of memory is pretty standard for compact external drives. At this point, all the digital photos I have total about half a TB, so I have many years to fill up a external hard drive.
To download photos from your camera memory card to a hard drive, you simply plug your memory card into your computer’s memory card reader. If your computer doesn’t have a built-in card reader, you will need an external memory card reader that you can plug into your computer via a USB cable; then plug your external hard drive into your computer, and download the photos from your memory card onto your external hard drive.
After you have downloaded photos from your camera’s memory card, and double-checked to make sure your photos have definitely been transferred to the external hard drive, you can erase the photos from your memory card. I accomplish this by re-inserting the memory card into the camera and “formatting” the card, which effectively erases all photos from the memory card. This permits you to start taking your next series of photos using the same memory card.
You will repeat this process every couple weeks, or whenever you wish, with the understanding that the memory card in your camera is a short-term place to collect the photos you take during a 2-week or 1-month period, for example. Then, each month or half-month, you can download photos to your personal “photo library” in your external hard drive.
Congratulations! Creating your photo library – a working copy of all your photos – is a big step in keeping your photos organized. You might consider this point where you have built the shelves of your library, and you are beginning to add books (files) of photos in an organized fashion, month to month, season to season, year to year.
But before we move to the next step, there is one more consideration: Your photos will become so important to you that you don’t even want to think about losing them in some way due to fire, flood, theft, or any other means. As with any computer files you have, as a precaution, it’s recommended to “double-save” all your photos. That is, you should have a second back-up external hard drive with a second copy of all your photos that you can keep somewhere safe and separate from the first copy of your photos. You can update the back-up files every month or so, and be sure to “hide” that second copy in a location outside your home – perhaps in your office, or better yet, in a locked fire-proof safety deposit box stored in a building separate from your home.
Naming Files
I usually download the file of photos on my camera’s photo card twice each month, but sometimes I download more often, and sometimes only once a month. Usually, I photograph for a short time most sunny days, so I tend to wait until I have a significant download – about every 2 weeks. On a week-long photo trip I may download daily, then place all the photos from the trip in a separate file within the season.
I name each downloaded photo file by ‘date and subject’ for quick reference. An example is: “September 1-18 2020 - Hummingbirds, Merlin, Cedar Waxwings, Peregrine, Hawks.” The birds listed in the title are not necessarily all-inclusive, but they emphasize the best photos and that reminds me about the other photo subjects during that period. Obviously, you will have your own naming system that you prefer.

In my filing system, I put each downloaded file into an appropriate seasonal file entitled “Winter,” “Spring,” “Summer,” or “Fall.” Personally, for filing purposes, instead of going by the calendar dates of each season, I place photos taken during the 3-month period from January through March in a file named “Winter,” photos from April through June in the “Spring” file, July through September in “Summer,” and October through December in “Fall.” At the end of the year, I filed the 4 seasonal files into an annual file named “2020 Photos.” Then I started a new “Winter” file for the photos I take during the first 3 months of 2021. It all works very well for me as I sort through files to find photographs of certain birds as needed.
Again, you can develop a file naming method that works best for your personal interests. You can also make a variety of favorite photos files, or trip-specific, or bird family-specific files, for example. When I do this, I leave the original photo in its original file and copy a duplicate of the photo into favorite photo files.
Naming Individual Photos
For the photos you consider your best within a given file, duplicate the original photos and give them each an individual name. Keep in mind that any computer files – including photographs – are automatically filed in order numerically, then alphabetically. Therefore, you can use this information to your advantage when writing titles for your photos and files. Everyone has their personal way of naming photos, but I’ll share my method, which serves me well, to give you an example that you might be interested in using, improving, or modifying to serve your interests best.
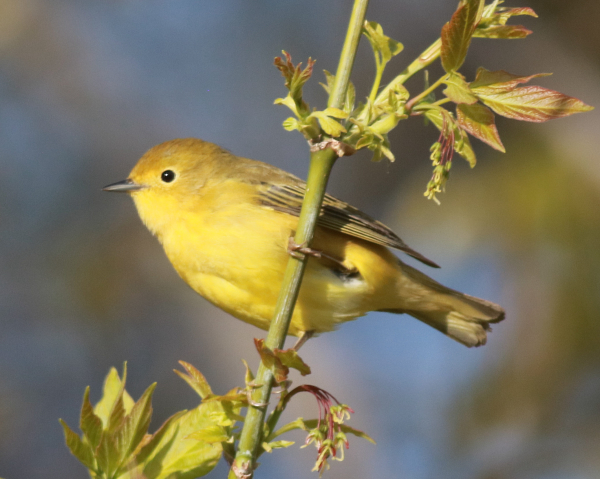
An example of my photo naming method is: “Songbirds - Yellow Warbler female side ND 5-20” (see the first photo). To name a photo:
- 1) First, I categorize all bird photos by bird groups, such as Ducks, Geese, Gulls, Owls, Raptors, Shorebirds, Songbirds, and Wading Birds to name a few.
- 2) Next I add the species name, followed by the sex of the bird if relevant, or the age of the bird if it’s not an adult.
- 3) Then a short description of what the bird is doing – flying, swimming, perched, etc.
- 4) I also add the state abbreviation to indicate where I photographed the bird, followed by the numeric month and year, such as FL 3-21 (for Florida, March 2021).
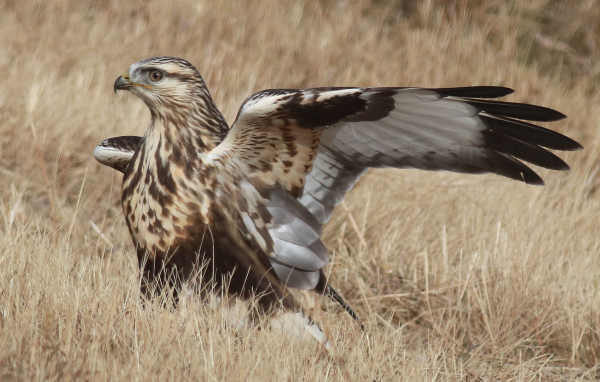
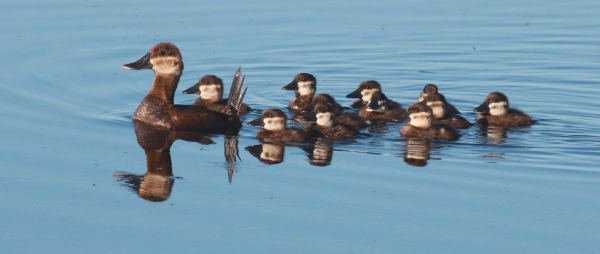
Another example title is: “Ducks - Ruddy Duck brood 11 swimming mirrored ND 7-20” (see the third photo); the 11 indicates the number of ducklings in the brood. And one more example is “Raptors - Rough-legged Hawk hunting 4x ND 11-20”; the “4x” indicates this photo was the 4th image in a series of photos (see the fifth photo). There are no hard and fast rules to naming photos or files; but these are examples of what works well for me.
Fresh from the Field, Photo Review
From experience, I can share that it’s important to keep on top of your photo editing process so it doesn’t become a bigger or overwhelming job. Editing photos is fun, and it should be an enjoyable part of your bird photography process. After each outing we are usually excited to get an initial look at our photographs on a computer screen, so take a little extra time to take a second look at them to make a quick initial edit of your photos then.
While you’re at it, after you go through the images for an initial look, it’s also a good time to do some initial photo editing – deciding which photos are worthy of keeping, and which ones should be deleted. Initially, the editing process is a matter of deleting poor quality images – blurry, unsharp, or poorly colored images. Photos with distant subjects, with birds in unattractive positions, or poorly lighted photos tend to be delete-worthy too.
Then, within this editing process, I pick out the real keepers – the photos that stand out that I want to keep and share as favorites. I make a copy of these images, give each a name, and determine if any needs a little photo editing. Some photographs benefit from a simple photo editing option – simply cropping them – that is, cutting out extraneous material in a given photo frame using a photo editing software program. At the end of the season, or the end of the year, I make a copy of each named photo that I place in a ‘keeper file’ named: “Best of 2020,” which I’m working on now.
For now, you have this guide to help keep your photos organized, plus some advice about how to keep your valuable photo files copied, protected, and safe. In the meantime, get out in the sunshine with your camera in search of birds, and enjoy taking the next great photos that birds provide for you – that’s really birding at its best.
Article and photographs by Paul Konrad
Share your bird photos and birding experiences at editorstbw2@gmail.com