
When photographing birds, it’s usually a matter of trying to get close enough to get a quality photo – and that’s even with the aid of a lens that provides ample magnification. Too often we get documentary photos of a distant avian subject, but once in a while we get lucky and encounter a trusting bird, sometimes even a bird that walks, swims, or flies closer. Having photographed extensively in California, Texas, and Florida, I must say that wintering birds that get familiar with people walking by or photographing at birding hotspots or beaches are more common in these coastal states with high human populations than anywhere else.
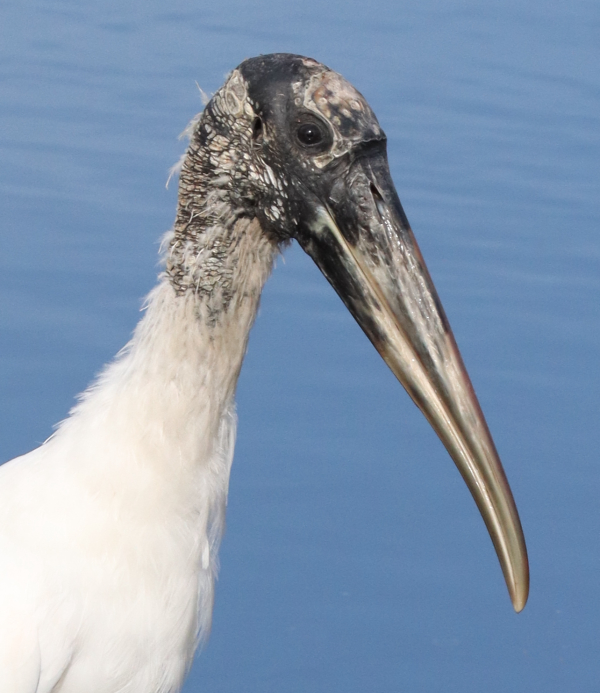
A Wood Stork is a large formidable bird, and Paul didn’t magnify this stork very much with his zoom lens when he found himself closer than expected. After taking this photo, he zoomed out to frame photos that show the entire Wood Stork wading in beautifully colored background water (photo info: 200mm zoom lens, f-10 aperture, 1/1000 shutter speed, 800 ISO).
|
From my experience, there is no question that Florida birds – some resident birds even more than wintering birds – lead the way in the trust department to the point where it’s possible to get especially close photos of some individuals. This is especially true at some of the well-visited birding hotspots, like the Venice Audubon Rookery, but it can happen anytime, anywhere. And with many species taking advantage of wetlands and impoundments created to hold water in low-lying housing developments in many suburbs, the birds get very accustomed to people who generally are excited or uninterested in seeing them in their yards or near their property.
Avian Portraits
When I refer to the idea of close-up photos, I mean portraits of just the head, neck, and shoulders of the bird, like your high school graduation photo, so taking that kind of photos is usually going to be a larger bird to manage that level of close photos. The simple trick to taking advantage of such a trusting bird is to make the most of the opportunity. Stay with it, don’t cause any level of alarm, move slowly if you move. Focus on the bird’s eye, and watch your background. In most cases, take some initial photos; then, if you have a chance to make an adjustment, it’s best to try to dial the aperture to f5 or a similar setting to reduce the area in focus. That technique will keep the bird in focus, while blurring the background, and it will increase the shutter speed to ensure the photos you take are sharper.
However, if your background is a uniform color, say a sky or water background, the aperture is less of a concern. The idea is to try to “pop” the bird apart from the background, even beyond color differences. The bottom line is always “take what you can get, and improve if possible.” In the moment, it’s really thrilling to be so close, and to get optically closer yet with a telephoto or zoom lens zeroing in on the bird’s face, focusing on the eye.
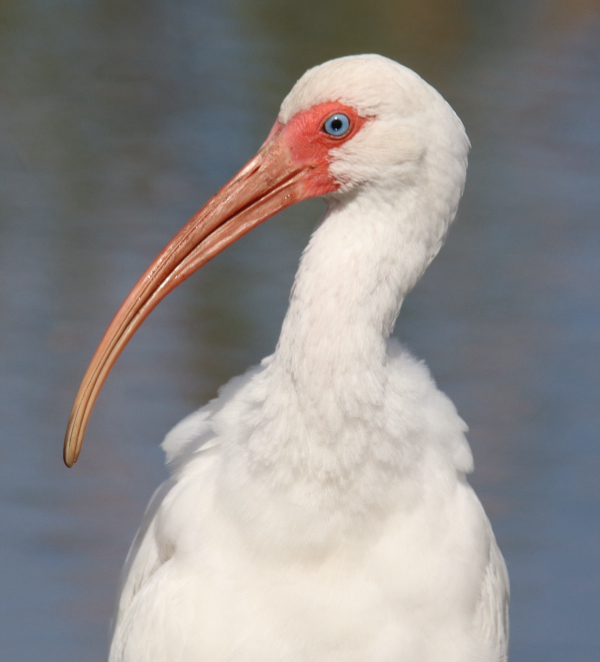
A favorite close White Ibis photo draws your eye to the blue eye of the ibis, which is off-set by its pink facial skin. Always focus on the eye of birds, especially when taking close focus photos (500mm zoom lens, f-10 aperture, 1/2500 shutter speed, 400 ISO).
|
The key to sharing close photos of birds is that you need to have a photo of a bird with a sharp eye. That’s true if you are using a photo as is, or if you are cropping the photo, which is a secondary way to create a close-up of a bird’s face and neck, or face, neck, and shoulders – a portrait. I must share that it’s especially fulfilling to take portrait photos like the images that illustrate this article. You feel “close” to the birds, in company with them as they permit you into their inner sanctum; and if you can just walk away without disturbing them, or let them walk away as they wish, it’s especially gratifying.
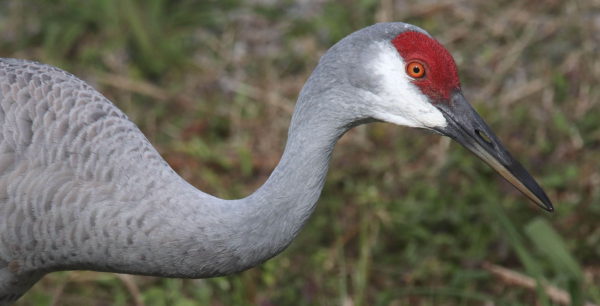
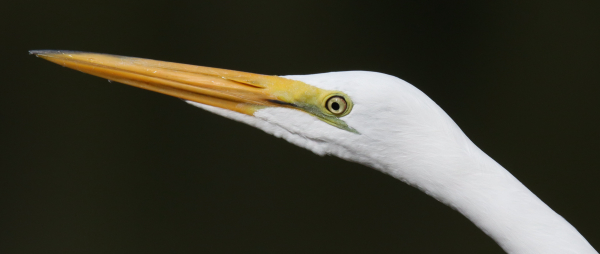
The idea for this article came to mind after I had a chance to photograph a number of large birds – the Wood Stork, a pair of Florida Sandhill Cranes, a Great Egret, and a couple others while I was in central Florida recently. For example, with the Wood Stork, I was casually driving down a suburban street when I spied a Wood Stork in a distant corner of a pond, essentially in a number of home’s backyard. I quickly responded, turning around and returning to the area, looking for a point of access to the lake, then suddenly finding big stork in a different pond – close – adjacent to the side street I was on. I quickly parked, checked my camera settings, and walked cautiously from my van to an opening in the landscaping where I had a clear view of the bird – a clear photo line. I was immediately surprised by how close I was to the stork, so quickly zoomed down from my preset 600mm magnification to 200mm and took a couple initial photos. Then I quickly zoomed out to get a full-sized view and photos of the impressive Wood Stork as it waded a couple steps in my direction. The grand bird was surrounded by sky blue water with barely a ripple on it, which made for an especially pleasing background that was emphasized by brilliant morning light.
Of course, it was the first couple photos that I took at the 200mm magnification that provided the close portrait images, sharp as could be. And the chance opportunity to photograph the very trusting Wood Stork provided the best photos I’ve taken of the species to date of a bird on water or land (I have great photos of Wood Storks in flight that I took at Everglades National Park 3 years ago).
Using a zoom lens was key to taking full-frame photos of the stork, as well as being able to get portrait photos of the bird that show a lot of detail of the dinosaur-looking face of the big wading bird. Even I am impressed with the quality sharp images produced during the few minutes I had in the stork’s company, but you will find that the closer you are to a bird, the better your lens seems to work. And if you are really close, you don’t need to do any cropping to zero-in on the bird a bit more.
Before I sign off, I feel somewhat compelled to share with you that although the photos I selected to illustrate this feature are super-sharp on my big-screen laptop computer, sometimes there seems to be a bit of a loss of image sharpness in the translation between my digital photos as viewed on my computer compared to when the same photos are published in our e-magazine publication. That said, the birds’ eyes in each of these photos are remarkably sharp; if they don’t look absolutely sharp, it’s because of a difference between the original digital image and our published online image – but hopefully that won’t be a factor in the photos illustrating this article.
Then too, maybe it’s because I have such a fine-tuned eye for photo sharpness, and that’s an important point to keep in mind; be sure that you don’t over-enlarge a given photo. Share sharp, clear photos that don’t show a grainy background or body lines, which is a sure sign of over-enlarging a photo.
Birds are great fun to photograph, and any time we get close enough to take a head and shoulders portrait of a bird, it’s a great breakthrough that we will likely remember forever, especially when you have a quality photo to share and display as one of your favorites. Good Luck as you search out January photo opportunities; and if you’re not in Florida, stay warm!
Article and photographs by Paul Konrad
Share your bird photos and birding experiences at editorstbw2@gmail.com